JAWS 14 New Features, Part Two - Flexible Web
NOTE: For those of you participating in the live Webinar, the following link will open the documentation in a new browser window.
Frequently, you will encounter Web pages that contain a lot of excess content which can make it difficult to locate the actual content you want, or interrupts the flow when reading. For instance, many sites contain Google or other ad frames. These can be troublesome for JAWS users as they disrupt the reading order of surrounding content.
Flexible Web enables you to take more control of Web pages by allowing you to quickly find the content you are looking for, as well as hide content that interrupts the reading experience. You can hide sections of content, such as Google ad frames or other types of unnecessary content, for a smoother reading experience. In addition, you could have JAWS begin reading at a level one heading, or ARIA main region, as these may contain the most interesting content.
Starting Flexible Web
To use Flexible Web do the following:
- Open a Web page you want to customize in Internet Explorer or Firefox.
- Move the Virtual PC Cursor to the page element you want to hide, or from where you want to start reading when the page first loads.
- Activate the Flexible Web wizard by pressing the layered keystroke INSERT+SPACEBAR, followed by X. Alternatively, press INSERT+F2 to open the Run JAWS Manager dialog box, then choose Flexible Web.
Temporary Customization
Through several easy-to-follow steps, The Flexible Web wizard that opens provides you with two options:
- Hide
- Start reading at the selected element
The wizard then guides you through the process of creating a temporary customization by giving you various choices about the selected element and how you want to hide it or from where exactly to start reading. Once the customization has been made, it is immediately applied to the page. For instance, if you choose to hide all frames containing advertisements, you will not see any advertisements when navigating the page after making this temporary customization.
If you are not happy with how a customization is working, you can open the Flexible Web wizard to undo the last customization you made. When you return to the page, you can choose a different element or the same one, and then reactivate the Flexible Web wizard to retry the customization again perhaps with different criteria. For example, in the case of hiding those advertisement frames mentioned earlier, you probably want to hide all of them, not just the first one on the page. The wizard will provide you with choices about whether to hide just the first one or all of them.
Saving Rules
You can create as many customizations for a page as you want. Once you have created one or more customizations, you can save them as a rule, which is applied every time you load the particular page or site. To indicate that a rule has been applied to a page, JAWS plays a sound after the page loads. Rules can be applied to the current Web page, entire Web site, or globally for all Web sites. Otherwise, customizations are only temporary and are lost as soon as you navigate away from the current Web page or close the browser. If you have made temporary customizations and you attempt to navigate to another page or close the browser, a dialog box opens asking if you want to save your customizations as a rule.
Practice with Flexible Web
EXERCISE: Follow along with the instructor and open the Sample News Page for practice with Flexible Web.
Create a Temporary Flexible Web Rule
- First, try reading through the page on your own. Notice the following:
- There are typical navigation links across the top of the page that screen reader users must first read through.
- Next, there is a paragraph of text, followed by three frames. The three frames are inline frames, and contain links to several common social media Web sites. You hear the name of the frame at the beginning, the contents, including a link and some text, and finally the name of the frame again at the end. Screen reader users must traverse all three frames to get to the main content of the page.
- Take a look at the frames on the page with the JAWS list of frames, INSERT+F9.
- After the three frames is a separate section on the page called a division. Within this division is an advertisement graphic link. Again, screen reader users must navigate through this advertisement to get to the main content of the page. You can press the navigation quick key Z to move from one division to another on a Web page, or press INSERT+CTRL+Z to get a list of divisions.
- Finally, after pressing DOWN ARROW quite a few times on this page, one arrives at the level two heading for Flexible Web, which is where the main content of the page begins.
- Let us use Flexible Web to hide the social media frames and the advertisement. First, move back to the top of the page, and then press M to move to the first frame on the page.
- Now, use the layered keystroke to start Flexible Web, INSERT+SPACEBAR followed by the letter X. The initial page of the Flexible Web wizard opens.
Caption: Flexible Web Wizard, Page One
- Press ENTER to activate the Next button. The Choose an Action page of the Flexible Web wizard opens. Focus is on the first of two radio buttons, Hide an Element.
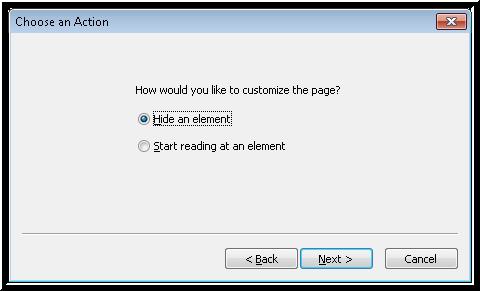
Caption: Flexible Web Wizard, Choose an Action
- That is exactly what you want to do in this case, so press ENTER to activate the Next button. The Choose an Element page of the Flexible Web wizard opens. Focus is in a list view with the Twitter frame selected.
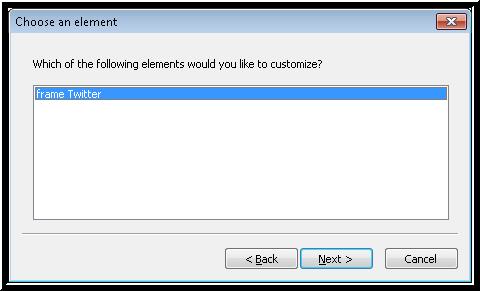
Caption: Flexible Web Wizard, Choose an Element
- Press ENTER to activate the Next button. The Choose a Customization page of the Flexible Web wizard opens. Focus is in another list view with several items available:
- Hide frame 1 from the top with text: "Twitter"
- Hide all frames with text: "Twitter"
- Hide frame 1 from the top
- Hide frame 3 from the bottom
- Hide all frames
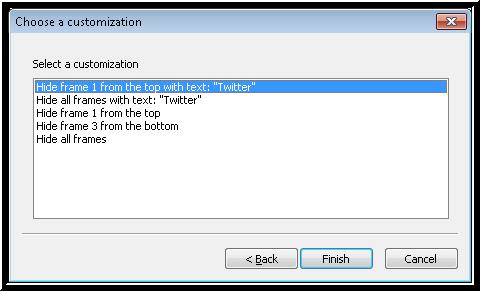
Caption: Flexible Web Wizard, Select a Customization
- For now, just press ENTER to activate the Finish button. The Flexible Web wizard closes, and focus returns to the Sample News page.
Try navigating by frames now by pressing the navigation quick key M. How many do you find now? I find only two, the Facebook and Stumble Upon frames.
Saving a Flexible Web Rule
I am not going to do this at the moment, but if you attempt to close the Sample News Page at this point in the exercise without saving the rule you created, a dialog box appears that gives you a chance to save the new rule. Here is an image of the dialog box. The text reads:
You have created a temporary Flexible Web customization. If you continue without saving them, these customizations will be lost. Would you like to save your temporary customizations? Yes, No.
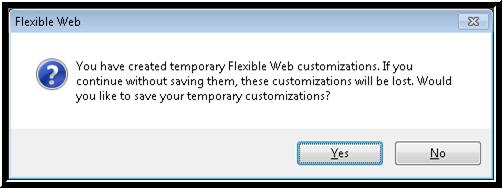
Caption: Flexible Web Wizard, Save a Temporary Customization
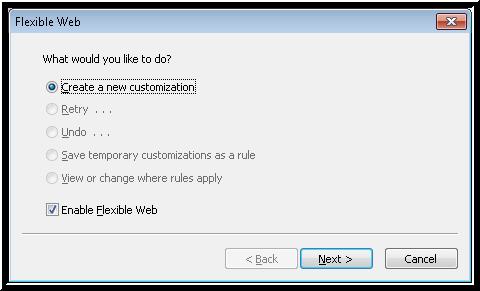
- Press INSERT+SPACEBAR, followed by X to open the Flexible Web wizard now, while you still have a temporary customization in place. The "What would you like to do?" dialog box opens, with more choices, including:
- Create a new customization
- Retry Hide frame 1 from the top with text: "Twitter"
- Undo Hide frame 1 from the top with text: "Twitter"
- Save temporary customizations as a rule
- View or change where rules apply (unavailable until you have saved rules first)
- Enable Flexible Web check box, checked
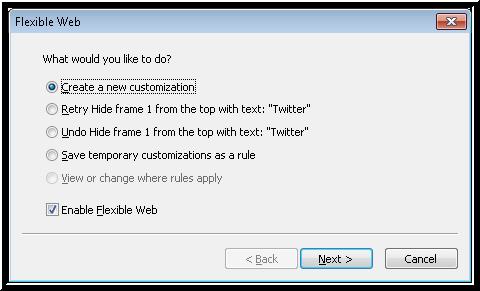
Caption: Flexible Web Wizard, What Would You Like To Do?
- I am going to choose the radio button "Save temporary customizations as a rule." The Save Temporary Customizations dialog box opens. Focus is in the Rule Name edit box.
- I will call this Hide Twitter Frame.
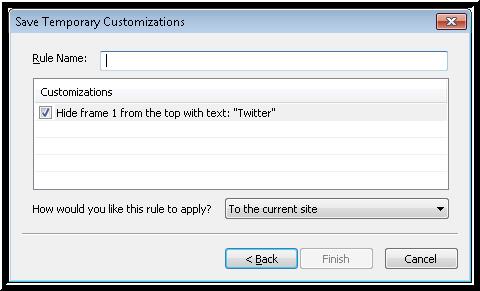
Caption: Flexible Web Wizard, Save Rule Name
- Before you activate the Finish button, press TAB to explore the other controls in this dialog box. The next control is the Customizations list box. Rules that are applied to this Web page have a check box next to them, and the check box is selected. Use this list to review the customizations which will be included in this rule. Use the SPACEBAR to clear the check boxes for any customizations you do not want to include.
NOTE: Remember to press INSERT+F1 on any control in the Flexible Wizard dialog boxes to get screen sensitive help for any item.
- Press TAB to move to the next control. Use this combo box to choose which pages this rule applies to.
You can apply the rule to the current page, current site, or all sites. For the purpose of this lesson, I will choose current page.
- Now, I will press ENTER to activate the Finish button. The dialog box closes, and the rule is now set.
Rename or Delete a Flexible Web Rule
To rename or delete a Flexible Web rule do the following:
- Open the Web page that has a rule and then press INSERT+SPACEBAR followed by X. The Flexible Web dialog box opens. Focus is on the Create a New Customization radio button.
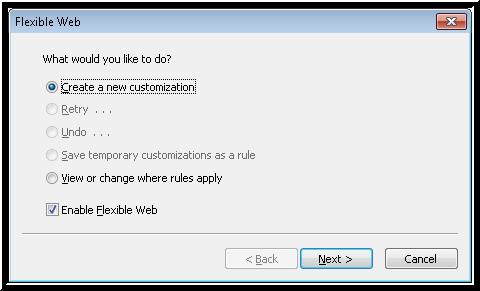
Caption: Flexible Web, What Would You Like To Do Dialog Box
- Press DOWN ARROW to move to the View or Change Where Rules Apply radio button, and then press ENTER to activate the Next button. The View or Change Where Rules are Applied dialog box opens. Focus is in the tree view.
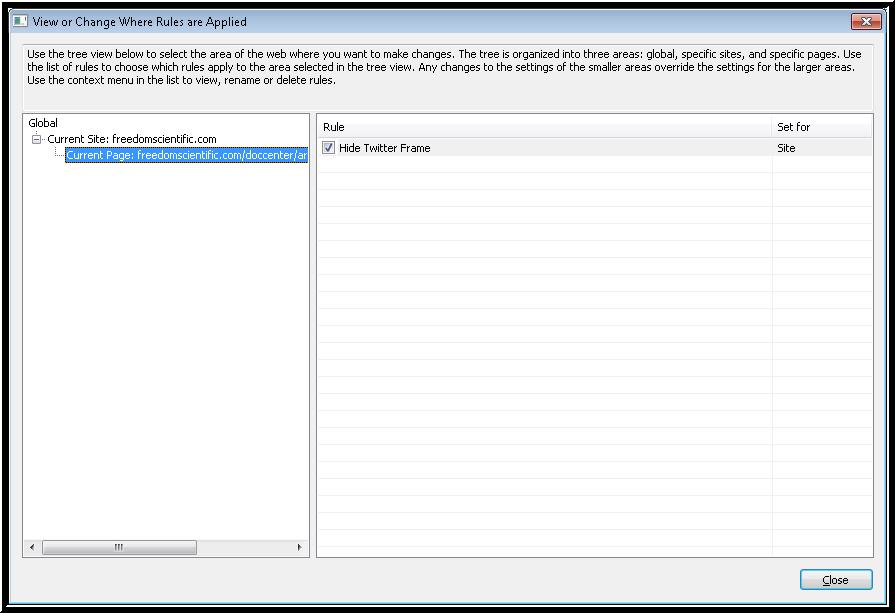
Caption: View or Change Where Rules are Applied dialog box
- Press TAB to move to the Rule list view, and then use the ARROW Keys to select a rule.
- To rename a rule, press F2 and edit the text.
- To delete a rule, press the DEL Key.
More Practice with the Sample News Page
EXERCISE: Create a rule that hides ALL frames on this page.
- First, move back to the top of the Sample News Page, and then press M to move to the first frame on the page. In this case, it should be the Facebook frame, since we hid the Twitter frame in an earlier exercise.
- Now, use the layered keystroke to start Flexible Web, INSERT+SPACEBAR followed by the letter X. The initial page of the Flexible Web wizard opens. Focus is on the Create a New Customization radio button.
- Press ENTER to activate the Next button. The Choose an Action page of the Flexible Web wizard opens. Focus is on the first of two radio buttons, Hide an Element.
- Press ENTER to activate the Next button. The Choose an Element page of the Flexible Web wizard opens. Focus is in a list view with the Facebook frame selected.
- Press ENTER to activate the Next button. The Choose a Customization page of the Flexible Web wizard opens. Focus is in another list view with several items available.
- Choose Hide All Frames in the list, and then press ENTER to activate the Finish button.
EXERCISE: Create a rule that hides the advertisement in the division on this page.
- First, move back to the top of the Sample News Page, and then press Z to move to the division on the page, which is where the advertisement is.
- Now, use the layered keystroke to start Flexible Web, INSERT+SPACEBAR followed by the letter X. The initial page of the Flexible Web wizard opens. Focus is on the Create a New Customization radio button.
- Press ENTER to activate the Next button. The Choose an Action page of the Flexible Web wizard opens. Focus is on the first of two radio buttons, Hide an Element.
- Press ENTER to activate the Next button. The Choose an Element page of the Flexible Web wizard opens. Focus is in the list view with the graphic image for the advertisement selected.
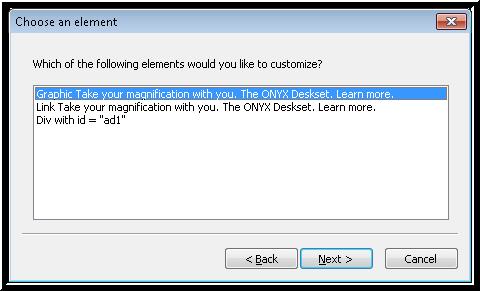
Caption: Choose an Element List for the Division on the Page
- Press ENTER to activate the Next button. The Choose a Customization page of the Flexible Web wizard opens. Focus is in the list view with several items available.
- Choose Hide Div 1 from the top with id="ad1" in the list, and then press ENTER to activate the Finish button.
EXERCISE: Create a rule that moves focus immediately to the heading level two, Flexible Web.
- First, move back to the top of the Sample News Page, and then press H to move to the heading level two, Flexible Web, on the page.
- Now, use the layered keystroke to start Flexible Web, INSERT+SPACEBAR followed by the letter X. The initial page of the Flexible Web wizard opens. Focus is on the Create a New Customization radio button.
- Press ENTER to activate the Next button. The Choose an Action dialog box opens. Focus is on the Hide an Element radio button.
- Press DOWN ARROW to choose Start Reading at an Element, and then press ENTER to activate the Next button. The Choose an Element page of the Flexible Web wizard opens. Focus is in the list view with the heading selected.
- Press ENTER to activate the Next button. The Choose a Customization dialog box opens. Focus is in a list view of choices.
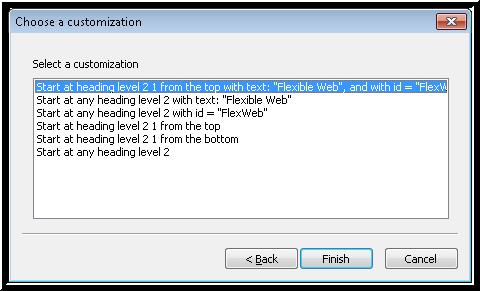
Caption: Choose a Customization Dialog Box for the Heading on the Page
- Choose the item in the list you want to use for the rule. In this case, I am going to choose Start at heading level 2 1 from the top, and then press ENTER to activate the Finish button.
Remember to save the rule. If you forget, JAWS will remind you when you try to close the page or when another page tries to load in the same browser window. Now, whenever this page opens you hear the sound indicating the page has Flexible Web rules, and focus is placed immediately on the first heading level two on the page.
Prior Page
Conclusion and Contact Information page