NOTE: For those of you participating in the live Webinar, the following link will open the documentation in a new browser window.
The information in this webinar applies to JAWS and MAGic with PDF files for Adobe Reader 7.0 or later and Adobe Acrobat 7.0 Professional or later. During this webinar the instructor is using Adobe Reader version 10.1.1
The most recent version of Adobe® Reader® at the time of this writing is version 10.1.1 which is also called Adobe Reader X. If you do not have this version you can download Adobe Reader 10 from the Adobe® Web site. If you already have Adobe Reader installed, you can also go to the Help menu in Adobe Reader and choose Check for Updates.
Adobe Reader has quite a few native keyboard commands. Here are a few to help with general navigation within PDF documents:
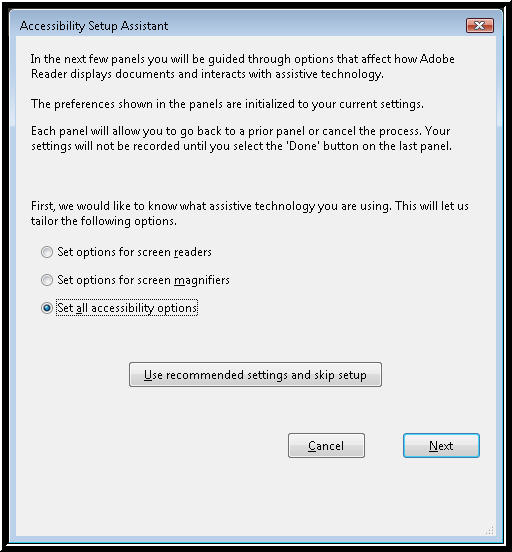
When you first start Adobe Reader and JAWS or MAGic are running, an Accessibility Setup Assistant dialog box opens and walks you through some simple steps to optimize Adobe Reader for your adaptive software. If you missed the Accessibility Setup Assistant or don't remember seeing it you can open it at any time from the Accessibility submenu found in the Edit menu.
In this initial dialog box there is a group of three radio buttons and an optional button to "Use recommended settings and skip setup." Pressing the optional button will bypass any other dialog boxes and apply the recommended settings for whichever radio button you choose. The three radio button choices are:
If you want to have the ability to pick and choose from among the options then choose the "Next" button and not the "Use Recommended Settings" button. The options are discussed further in the next few sections.
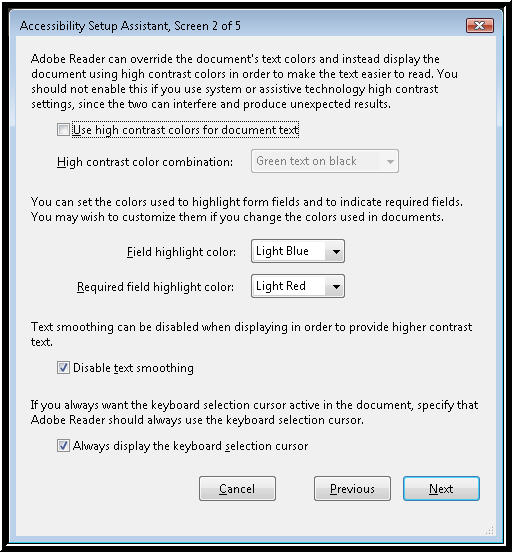
The instructor does not change anything on this page. However, you should feel free to experiment as needed with the different settings, depending on the access technology you use.
MAGic Tip: MAGic has smoothing of text built into it. If both MAGic and Adobe Reader try to smooth the text it can cause the screen not to display as well as it could. Therefore, if you use MAGic or any other programs that use their own smoothing, you should make sure the check box for Disable Text Smoothing is checked.
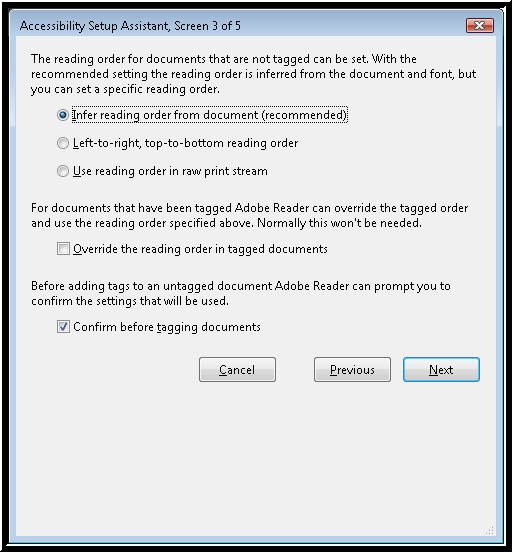
Again, the instructor makes no changes on this page.

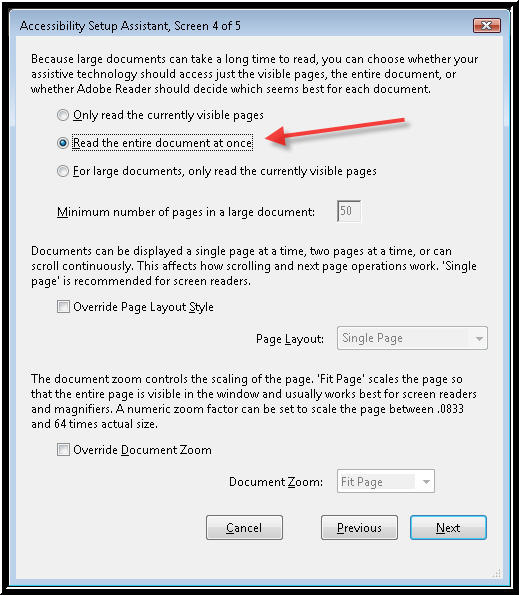
This is one page where the instructor recommends not using the default settings. The first group of radio buttons has been set for assistive technology to only look at 50 pages by default. The three choices are:
NOTE: Even though it may take a few seconds longer to load the entire document at once, this is needed if you intend to look for things like links or headings in the entire document for information. Therefore, if you frequently deal with PDF documents that are larger than 50 pages you may want to change this to the option that reads "Read the entire document at once."
EXERCISE: For now, make sure you have the third radio button above set as your choice. Go ahead through the next page of the Accessibility Setup Assistant and leave any settings as they are. Close the Accessibility Setup Assistant by pressing ENTER on the Finish Button. Then open the file MAGic Users Guide PDF document and follow along with the instructor. This is a 148 page document.
How long did the document take to open? About 2 seconds on my computer.
Press INSERT+F7 to open the list of links. What do you hear? No links.
Press INSERT+F6 to open the list of headings. What do you hear? No headings.
Press CTRL+SHIFT+N to open the Go To Page dialog box. Go to page 15. How many links and headings do you hear? Try using the list of links and list of headings here.
Now, go back into the Accessibility Setup Assistant again by pressing ALT+E to open the Edit menu in Adobe Reader. Choose the Accessibility submenu and choose Accessibility Setup Assistant, the last item in the menu, and press ENTER to open the first page of the dialog box again. Press ENTER until you come to page four again. This time choose the second radio button, "Read the entire document at once," and press ENTER a couple of times to finish with the Assistant.
Try using the list of links or list of headings again (INSERT+F7 or INSERT+F6). What happens? NO DIFFERENCE! Why?
NOTE: JAWS and MAGic gather virtual information the first time a document loads. If you make changes to any PDF document and want to test the changes, or if you make any changes to settings in Adobe Reader, always close the document and reopen it to show the changes to JAWS or MAGic.
Press CTRL+F4 to close just the document, but leave Adobe Reader open. Then press ALT+F to open the File menu in Adobe Reader followed by the number 1 on the numbers row. This is the keystroke to reopen the last file you viewed in most programs like Adobe Reader, Microsoft Word, and so on.
EXERCISE: Notice that it will take JAWS longer to process the page. Time it if you want to. If you press the SayLine keystroke to read the current line during the processing time, what does JAWS say? Alert: document being processed. Once the document has been processed, JAWS announces the number of links and headings. How many are there in the entire document? Headings = 350, Links = 182.
It may take a little longer to open the list of links or to gather information in large PDF documents, but it may also be necessary to change this setting to allow you to find all of the information you need in a timely fashion.
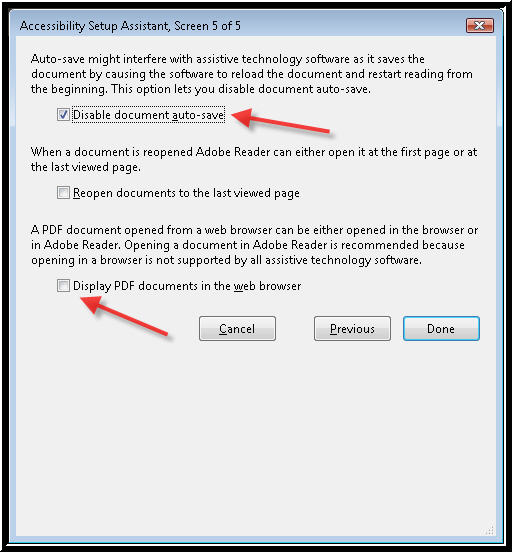
Start the Accessibility Setup Assistant again by pressing ALT+E to open the Edit menu in Adobe Reader. Choose the Accessibility submenu and choose Accessibility Setup Assistant, the last item in the menu, and press ENTER to open the first page of the dialog box again. Press ENTER until you come to page five.
NOTE: All of the options found in the Accessibility Setup Assistant are also found individually in the Adobe Reader Preferences dialog box. You can access the Preferences dialog box from the Edit menu or by pressing CTRL+K.
When you first install Acrobat Reader 10 an option called Protected Mode is turned on by default. Protected Mode can interfere with JAWS or MAGic and cause problems when reading PDF files. Perform the following steps to turn off Protected Mode in Acrobat Reader 10.
With the portfolio function in Acrobat 9 and later, you can combine documents and images from a wide variety of sources - including text documents, spreadsheets, graphic and image files, PowerPoint presentations, page-layout documents, and even CAD files - into a single, editable, searchable, compressed PDF portfolio. In a PDF portfolio each document can be viewed, edited, and saved separately.
By default, show portfolios in files mode is NOT checked in Adobe Reader. To enable this do the following: